http://www.itoosoft.com/railclone/tutorials/tutorial_parquet_floor.php
Parquet Floor Tutorial

Summary
| Description | Create 3 Parquet floor styles |
| Software | RailClone Pro 2.1 or higher, 3dsMax 2011 or higher |
| Level | Intermediate |
| Files |
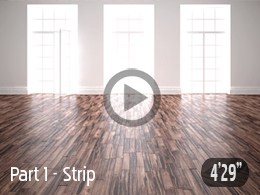
 Video Part I (Strip style)
Introduction
This quick-tip tutorial explains how to model parquet floors from individual planks using RailClone 2.1. The 2D array generator provides an excellent way to create a wide variety of floor patterns using only a single enclosed spline to define the boundary. Many patterns of parquet can easily be created with minimal effort using RailClone's parametric pattern based approach to modelling. Because RailClone uses the renderer's native geometry shaders to create instances on the fly, large areas can be created without significant increases in memory consumption or render time.
By completing this tutorial you will be able to:
- Create 2d arrays from a single enclosed spline
- Create reusable flooring styles.
- Use Conditional and Sequence operators.
- Use padding and absolute transforms to position and align planks.
- Use the expand parameter to ensure that patterns with diagonal elements do not leave spaces around the perimeter.
Preparing the geometry
When preparing the geometry for floors it's best to think in terms of rows and columns and it may make sense in some circumstances to rotate the planks prior to creating a new style. If this is the case, remember to reset the XForm or adjust the pivot so that the local coordinate system aligns to the world. The top view below shows the arrangement of the geometry for the 3 styles covered in this tutorial.
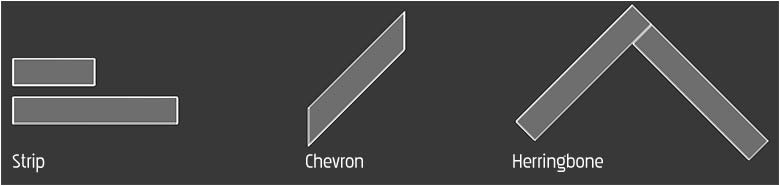
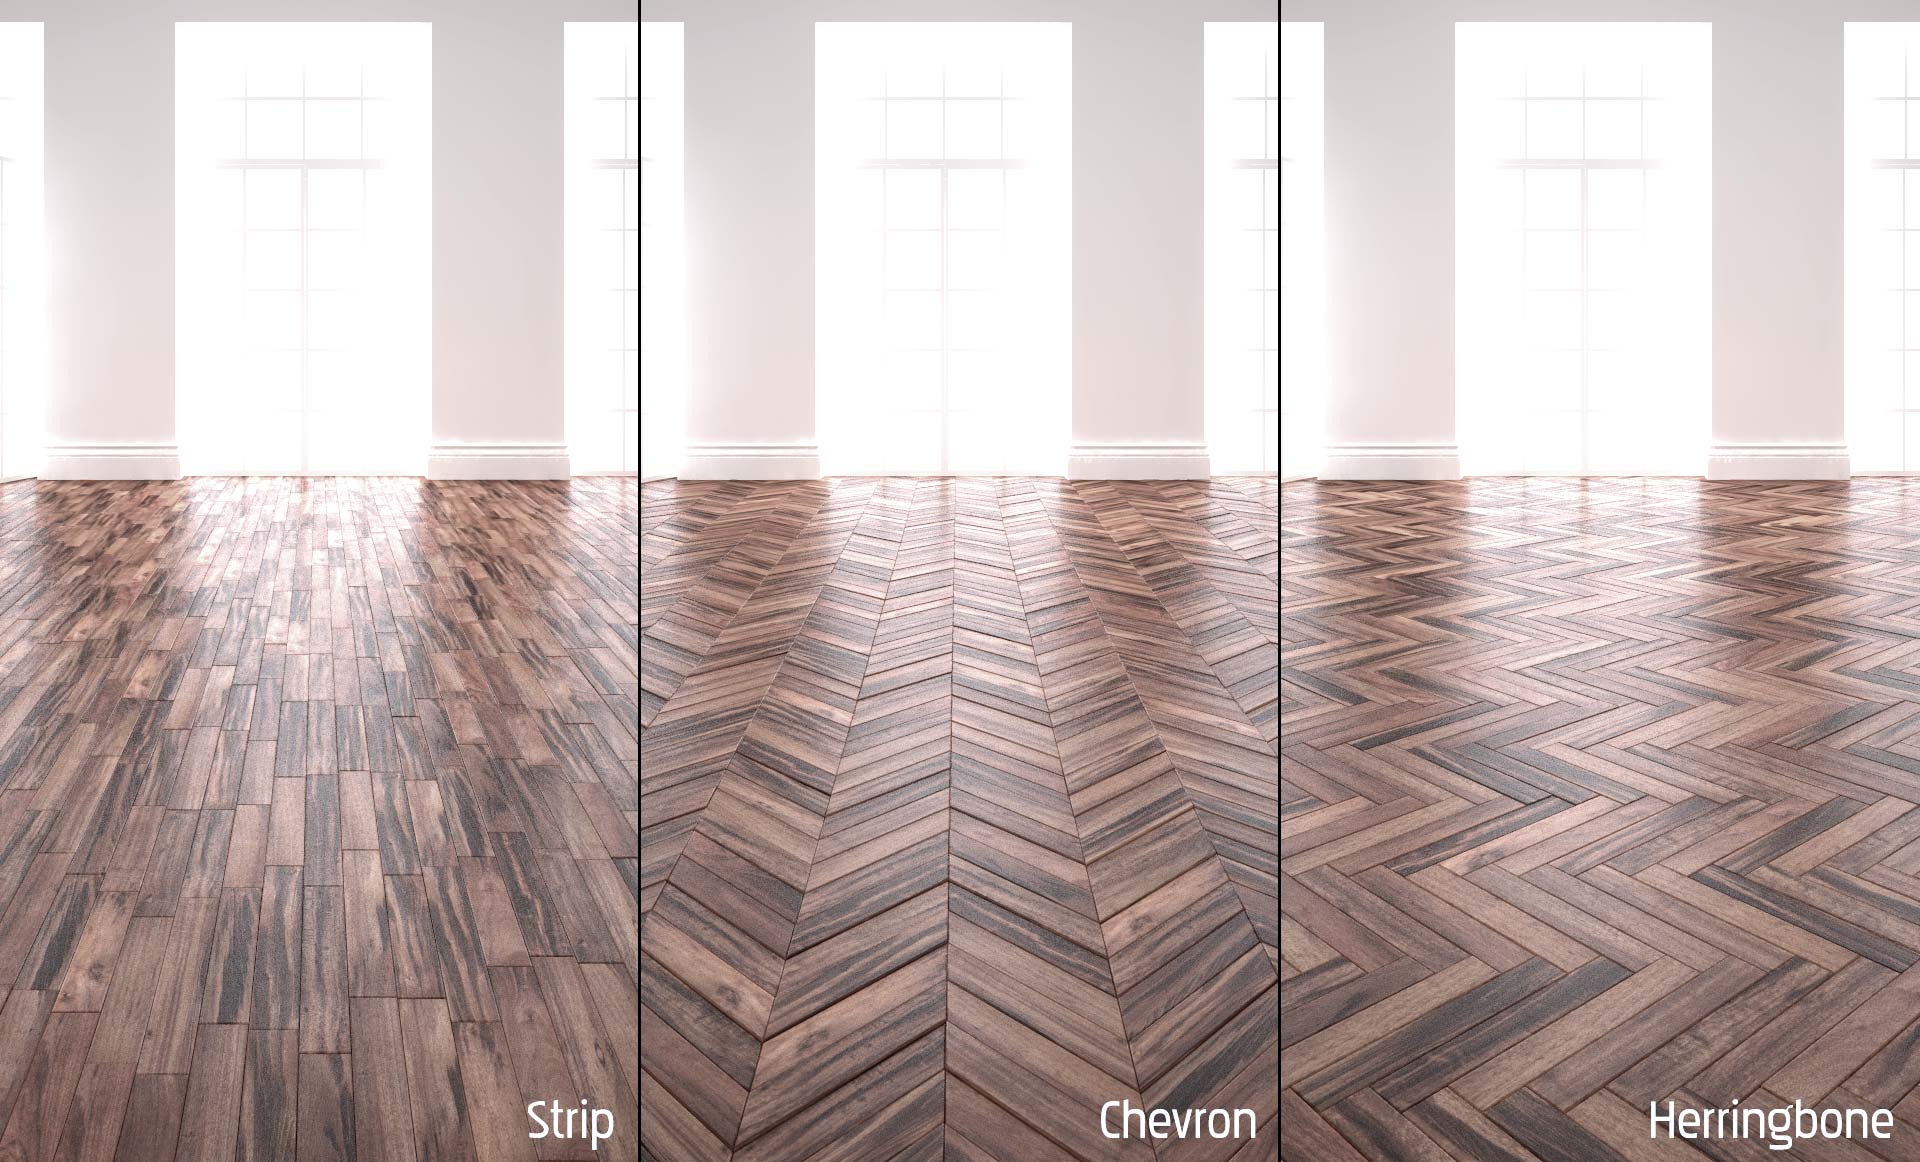
Style 1: Strip

Simple strip flooring is very easy to create with RailClone. To make this tutorial easier to follow, you'll find a RailClone object in the scene with all the necessary segments added. This style uses conditional operators to ensure that the first segment in every other row is a half length plank to create an offset pattern.
- Select RC_strip_flooring and open the style editor.
- Wire the spline node to the A2S generator's Clipping Area input and pick Rectangle 1 from the scene.
- From the A2S generators properties, turn on Extend X/Y Size to Array. This function automatically creates and aligns an array of a sufficient size to fully cover the clipping plane. Using this technique there is no need to manually define the style's X and Y dimensions.
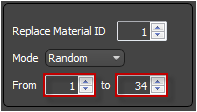
- Create a new Material node and set the Minimum and Maximum value to 1 and 36. The texture already applied to the RailClone object has 36 separate floor textures applied using a VRayMultiSubTex map, but any map or material that uses material IDs can be used. Wire the material node to the Default input of the generator.
- Create a new Conditional operator and set the Segment>X Counter to Equal 1.
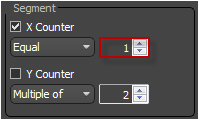
- Wire the Full Length segment to the conditional operator's False input
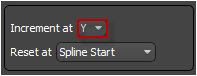
- Create a Sequence operator and set to Increment At Y. Wire it to the existing conditional operator's True input.
- Wire both segments to the sequence operator. You will now have a regular brick pattern.
- If you would like more variety in the pattern, it's possible to randomise the X Scale value of the segments. For both segments, go to Properties>Transform>Random and turn on Scale. Set the X Minimum value to 80 and the Maximum to 120.

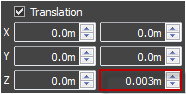
- If you want to add a little unevenness to the boards then turn on Properties>Transform>Random>Translation and set the Maximum value to 0.003m. In general for a new floor you want to keep this value quite small. If floor is aged then you may wish to increase the value to give a more dilapidated appearance.
Style 2: Chevron
The chevron style is a little different as the planks run diagonally, however by simple creating a zigzagging row, then using the top padding parameter to create an overlap, this pattern is relatively straighforward to recreate. To save time a RailClone object has already been provided with a Spline object and Material operator already in place. If you wish to revise these steps, please see steps 1 - 4 of the strip pattern tutorial above.
- Select RC_chevron_flooring and open the style editor.
- Create a new Compose operator and connect it to the Material operator.
- Connect the Plank Segment to the Compose operator's first input slot.
- Create a new Mirror operator and attach the Plank segment. Wire the Mirror node's output to the second input of the Compose operator.
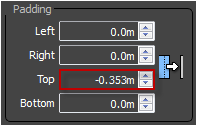
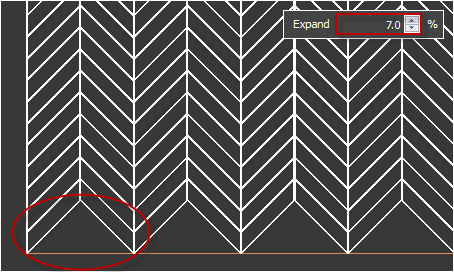
- You will now see a Zig Zag pattern, but the space between rows is too large, close it up by setting the segment's Properties>Padding>Top value to -0.353m.
- As in this case, some patterns may leave spaces around the boundaries of the clipping path. To fix this simply go to the Array Generator's properties and increase the General>Clipping Area>Expand value to 7%. This function increases the physical size of the array that was calculated automatically by turning on Extend X/Y Size to Area.
- Add a little variation to the segments position on the Z axis by going to Segment>Properties>Transform>Random and turning on Translation. Set the Minimum value to -0.001m and the Maximum value to 0.005m
Style 3: Herringbone
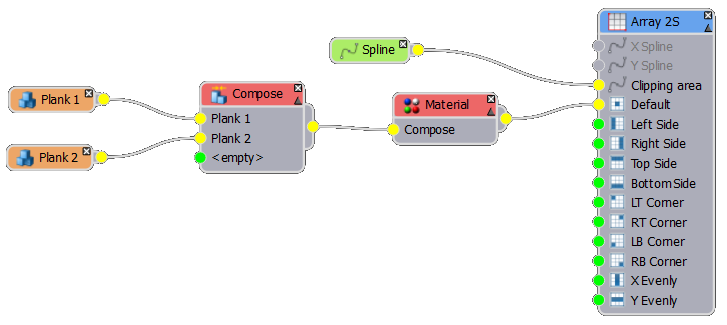
Herringbone patterns can be created simply from two planks. To create this pattern we'll use the principle described above to create an initial zigzagging pattern, but in this example using the transform and padding settings to overlap both rows and columns.
- Select RC_herringbone_flooring and open the style editor.
- Create a new Compose operator and connect it to the Material operator.
- Connect the Plank 1 and Plank 2 segments to the Compose node, in that order.
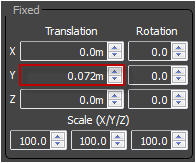
- To start positioning the segments correctly, set Plank 2's Properties>Transform>Translation>Y value to 0.072m.
- For both segments set the Right Padding to -0.068m and the Top Padding to -0.355m.
- Set the Generators Properties>Clipping>Expand value to 7%.
- Add some surface variation by changing both segment's Properties>Transform>Random>Translation>Z maximum value to 0.003m.

댓글